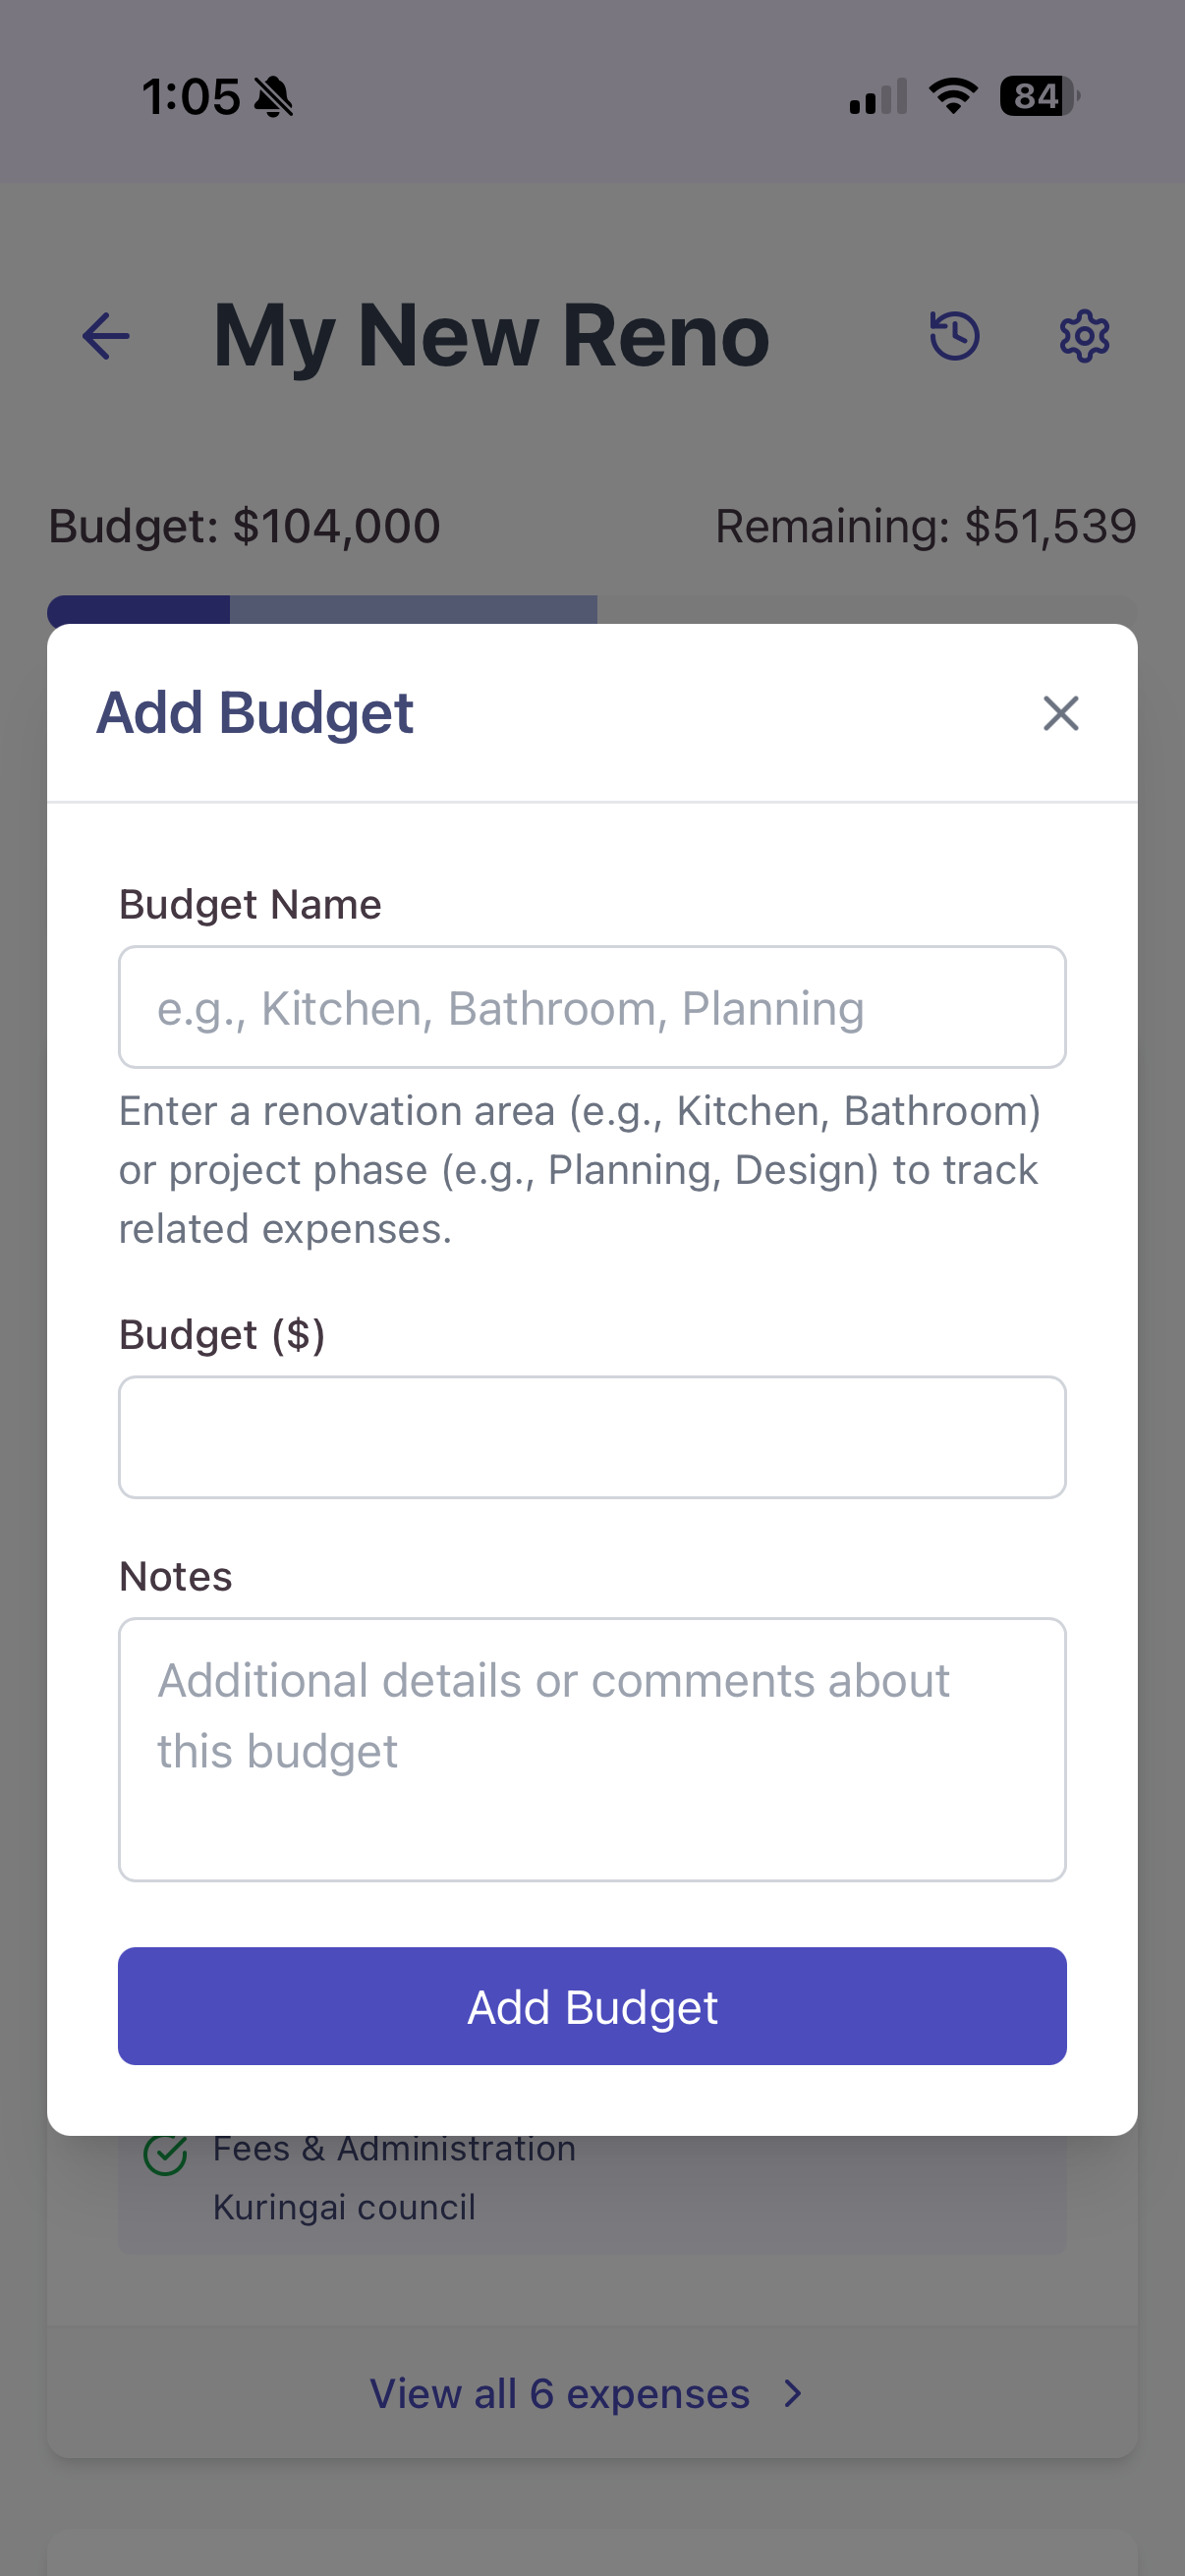
Setting up a budget is the first step to keeping your renovation on track.
Once you've created a project, you'll see a button to add a budget. Think of budgets as either individual spaces (like your Bathroom or Kitchen) or project phases (like Planning Approval or Construction). This structure helps you stay organised.
When you create expenses, you'll link them to one of these budgets. This way, you can easily see how your actual spending stacks up against what you've planned.

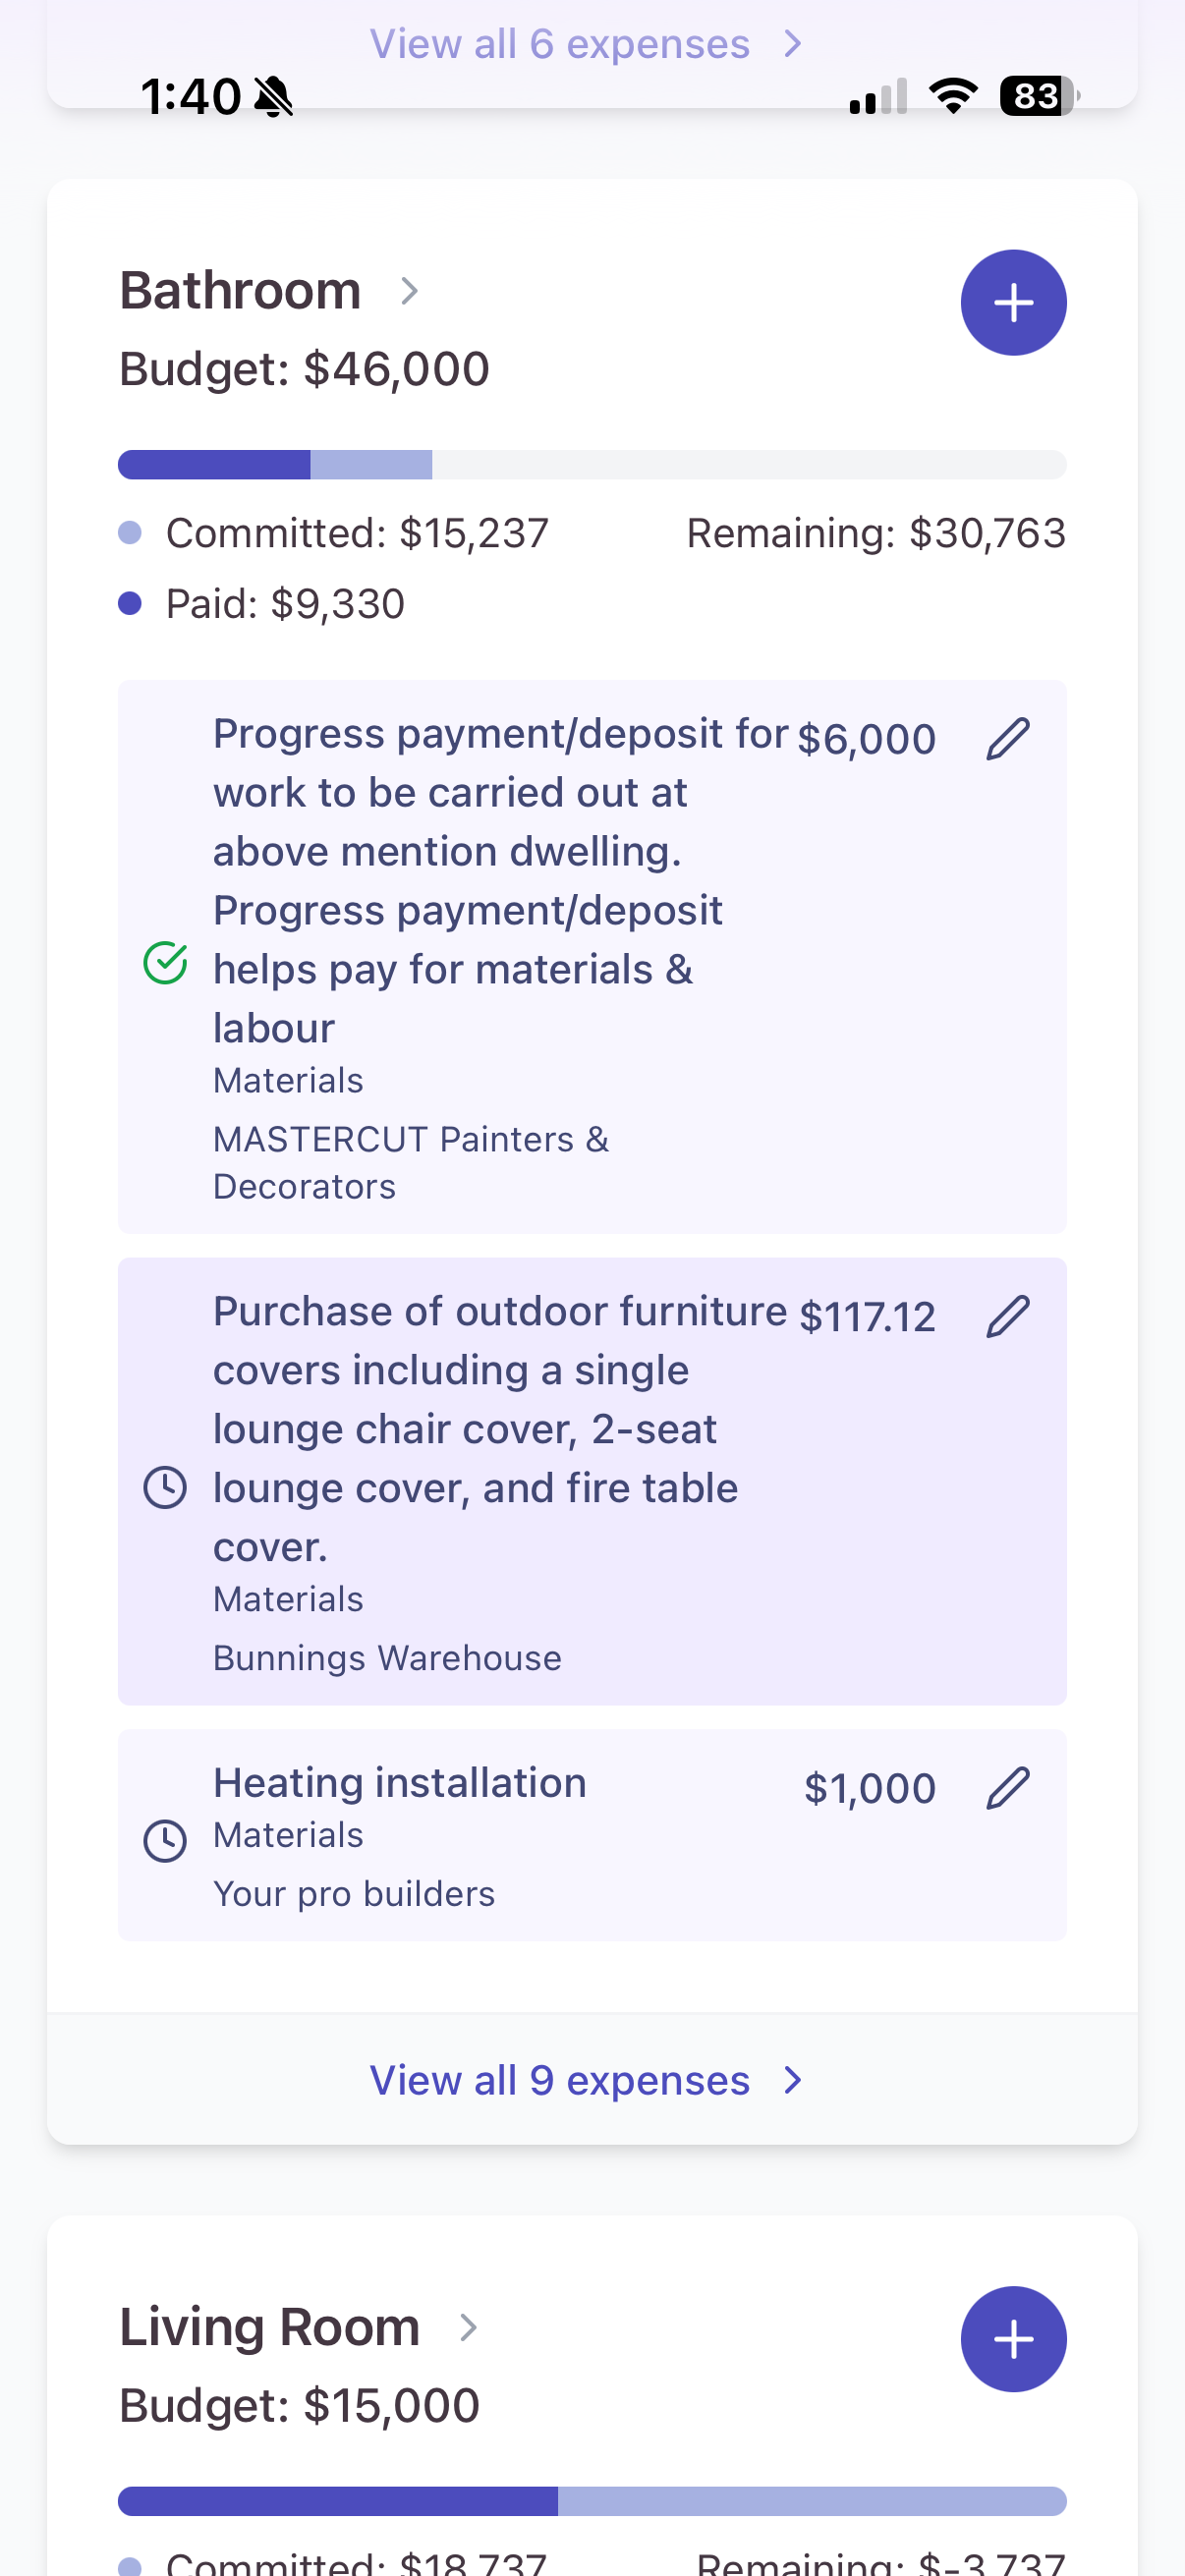
Keep on top of every renovation cost by adding expenses as they happen.
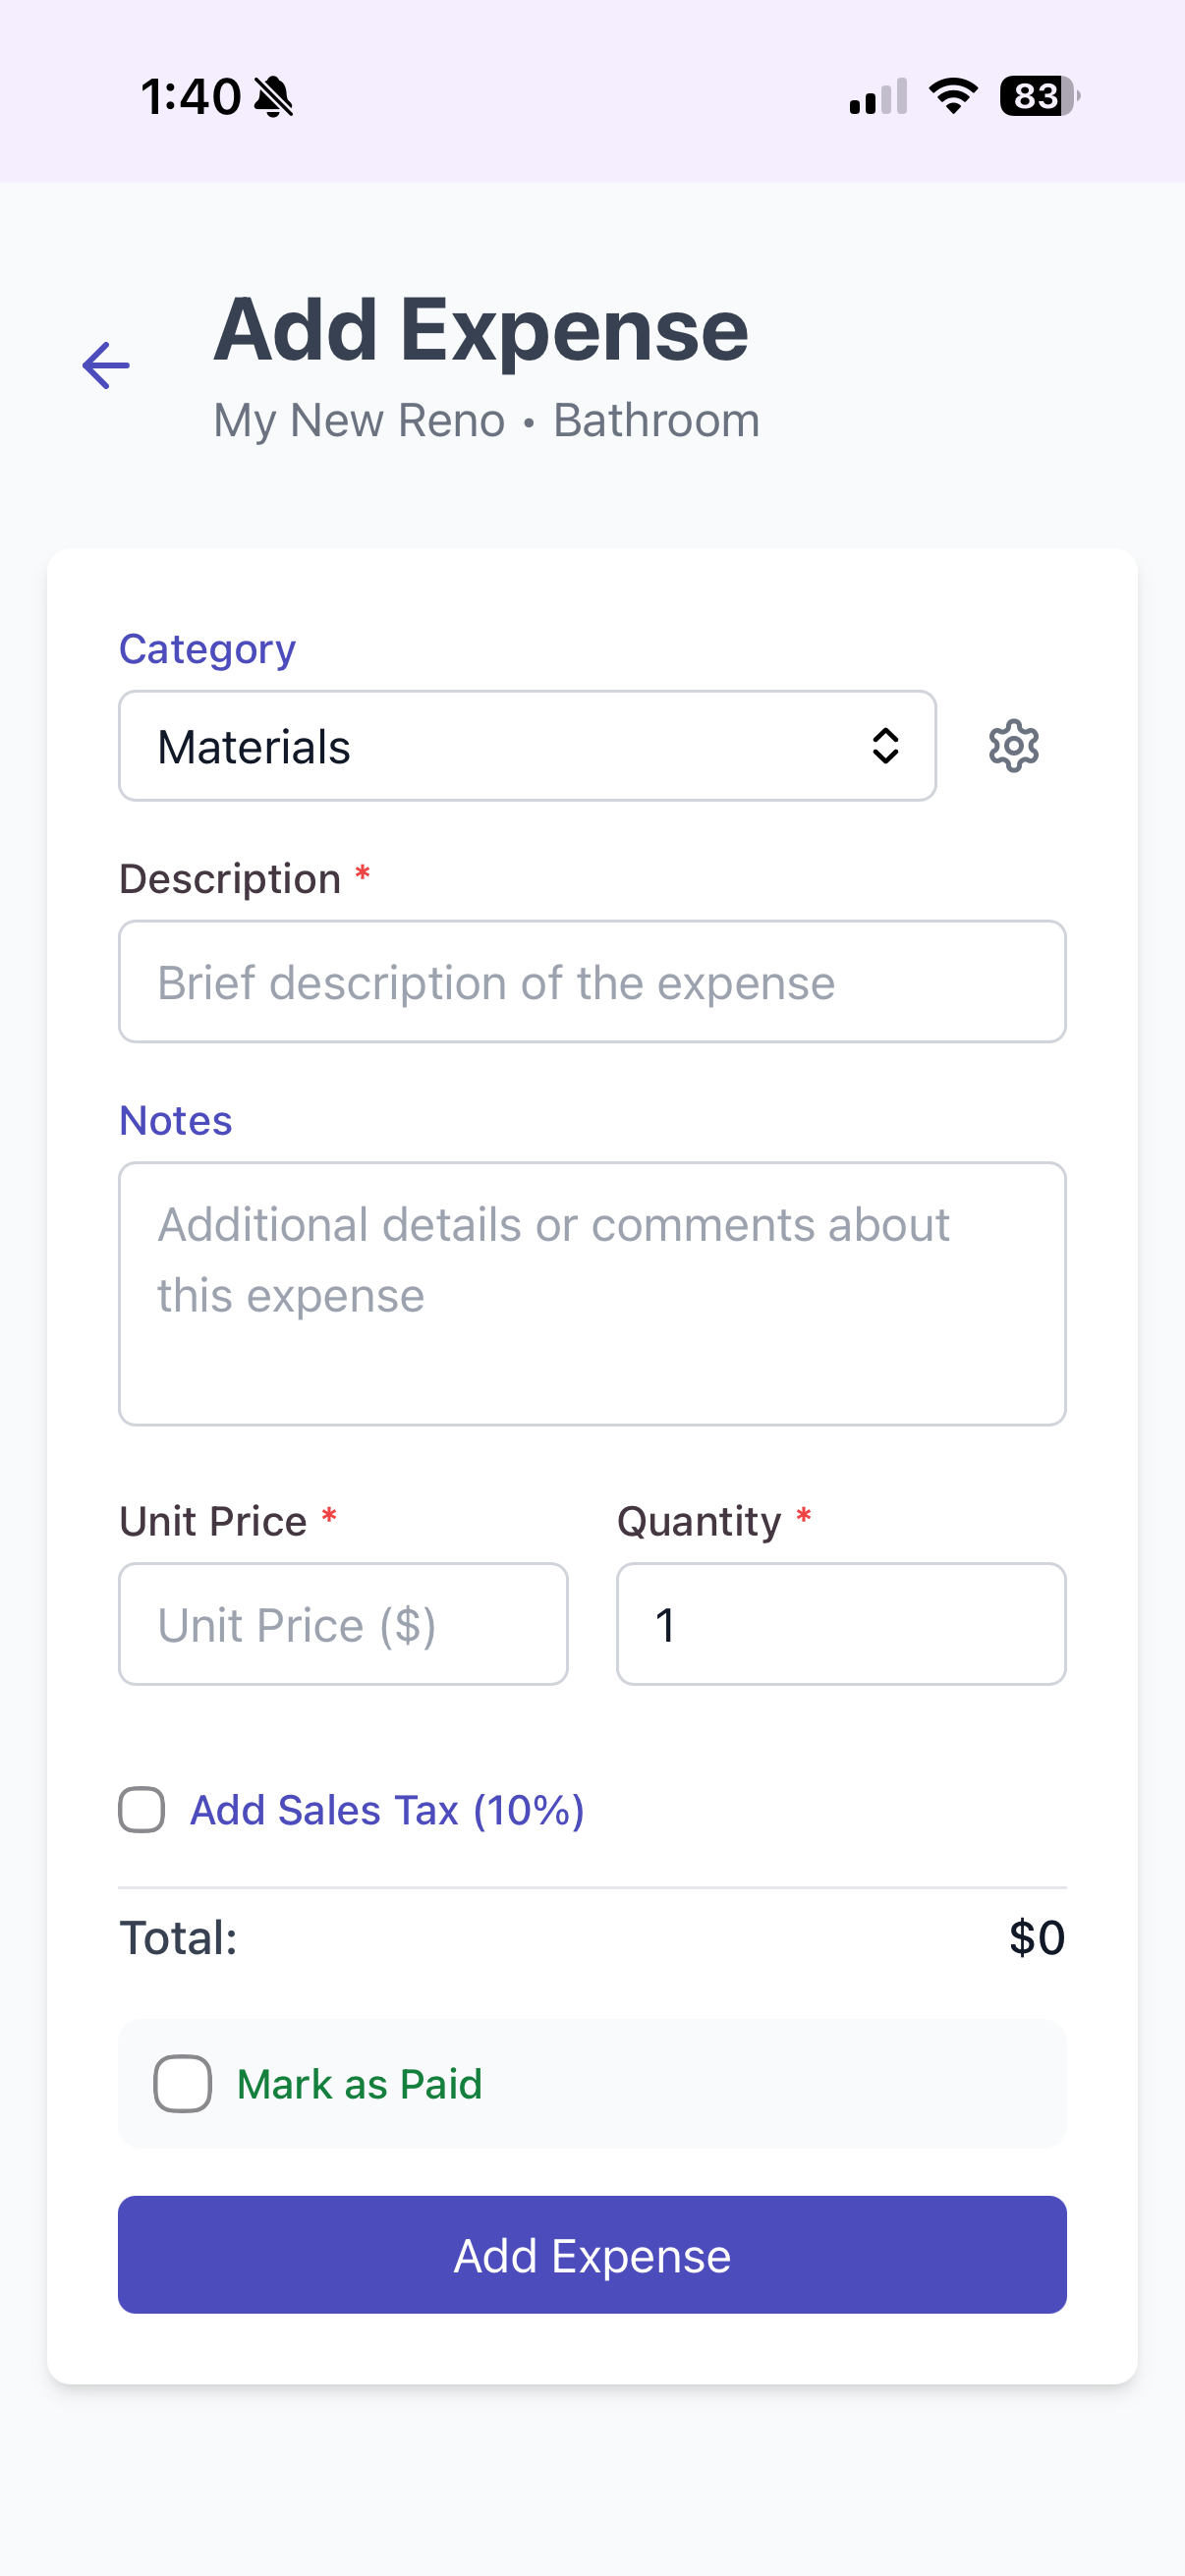
Categorise your expenses
When you add an expense, assign it a category. We've included standard categories to get you started, but tap the gear icon to customise them. This way you can track expenses exactly how you want to see them.
Enter the cost details
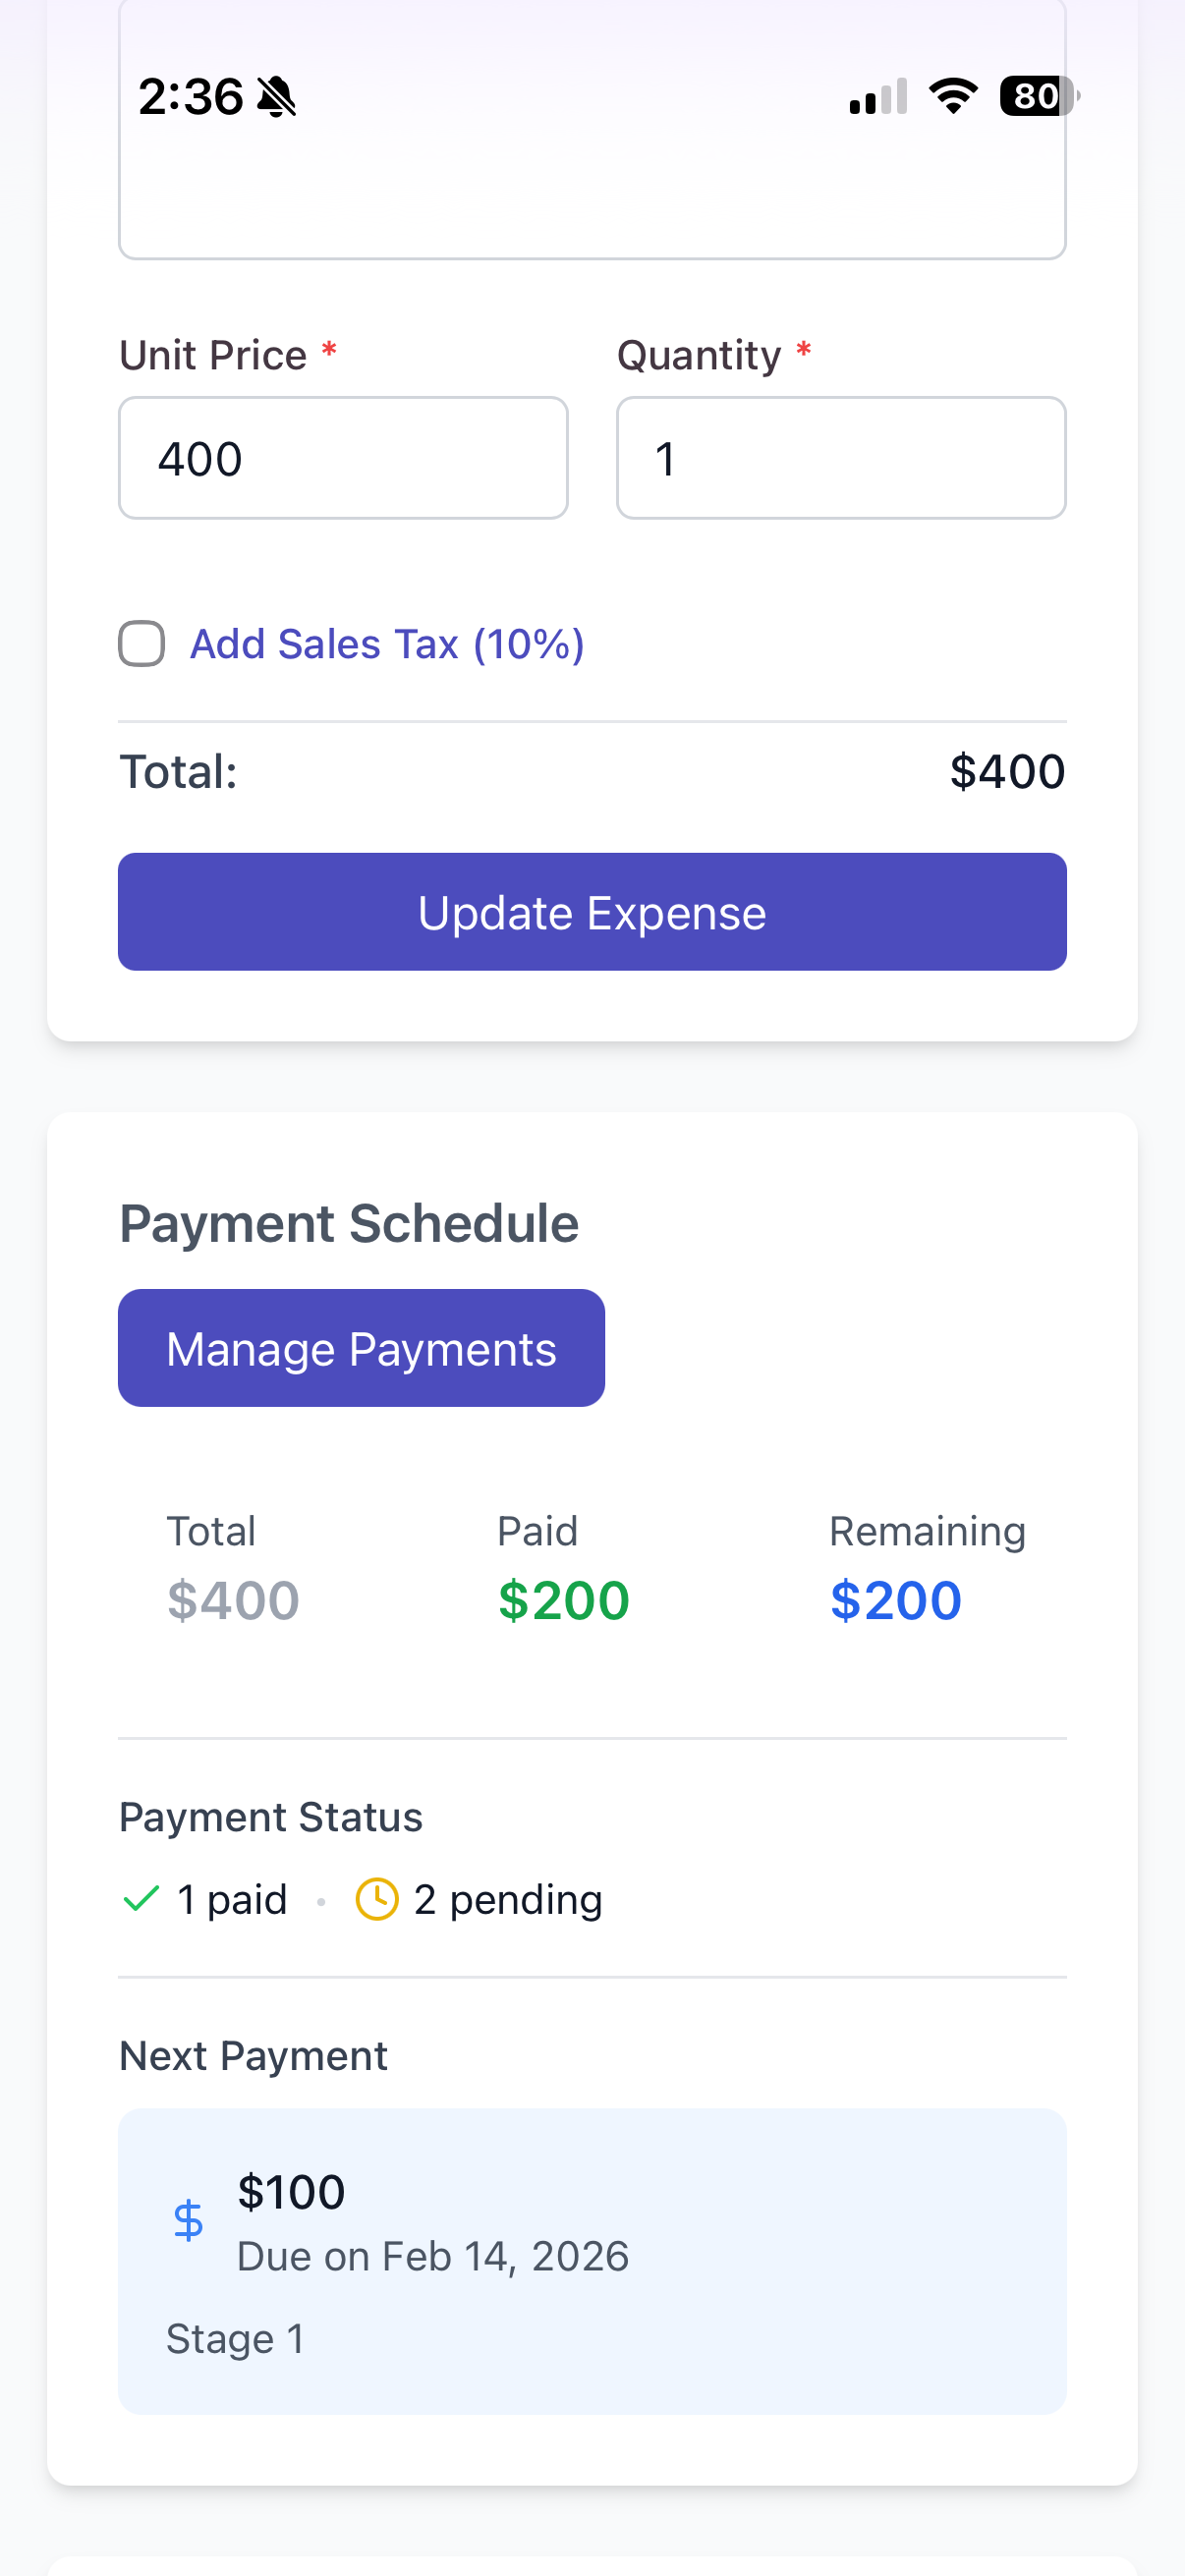
You can enter both a unit price and quantity—perfect for labour costs. For example, if your electrician charges $100 per hour for 10 hours of work, you'd enter $100 as the unit price and 10 as the quantity.
Add tax automatically
Sales tax can be calculated automatically. You can adjust this anytime in the app's settings.
Track what you've paid
Use the checkbox to mark an expense as paid. If the electrician's given you a quote but you haven't paid yet, leave it unchecked. This helps you see the difference between quoted costs and actual spending.
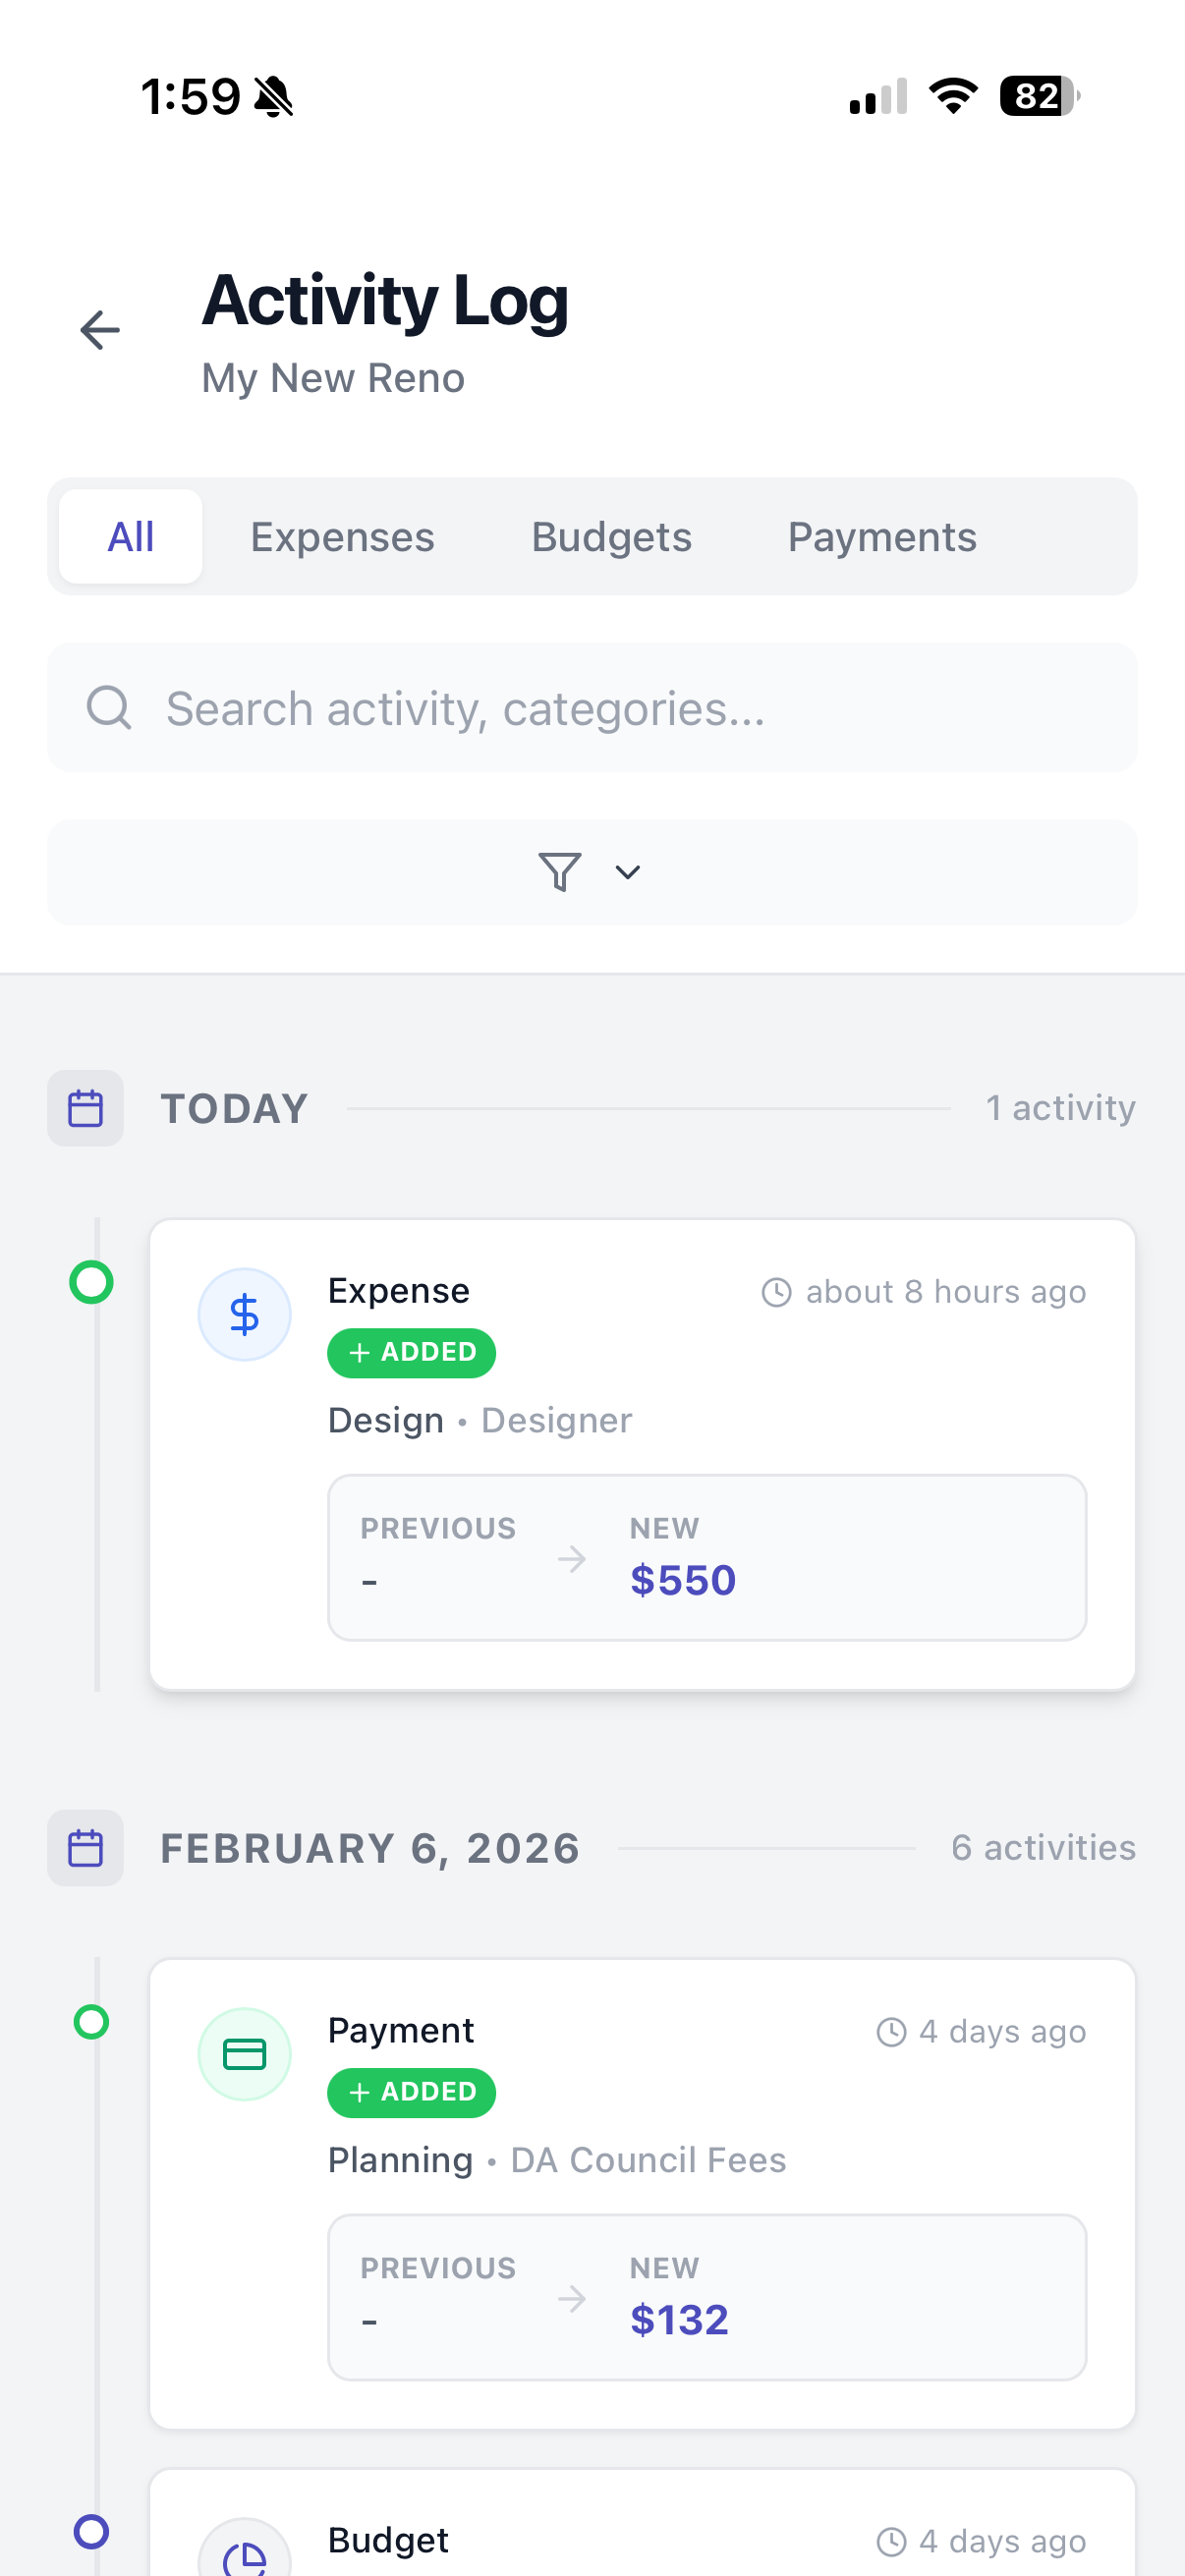
Every change you make in Budget My Reno is tracked in the activity log. This includes updates to expenses, adjustments to budgets, removals, and payment schedule changes.
You can go back in time to see exactly when changes were made—helpful if you need to understand your renovation's history.
Filter and find what you need
The Activity Log screen includes advanced filtering so you can narrow down what you're looking at. Filter by expense, budget change, or payment schedule update. Or go deeper and filter by budget category—for example, see all changes related to your Kitchen renovation.
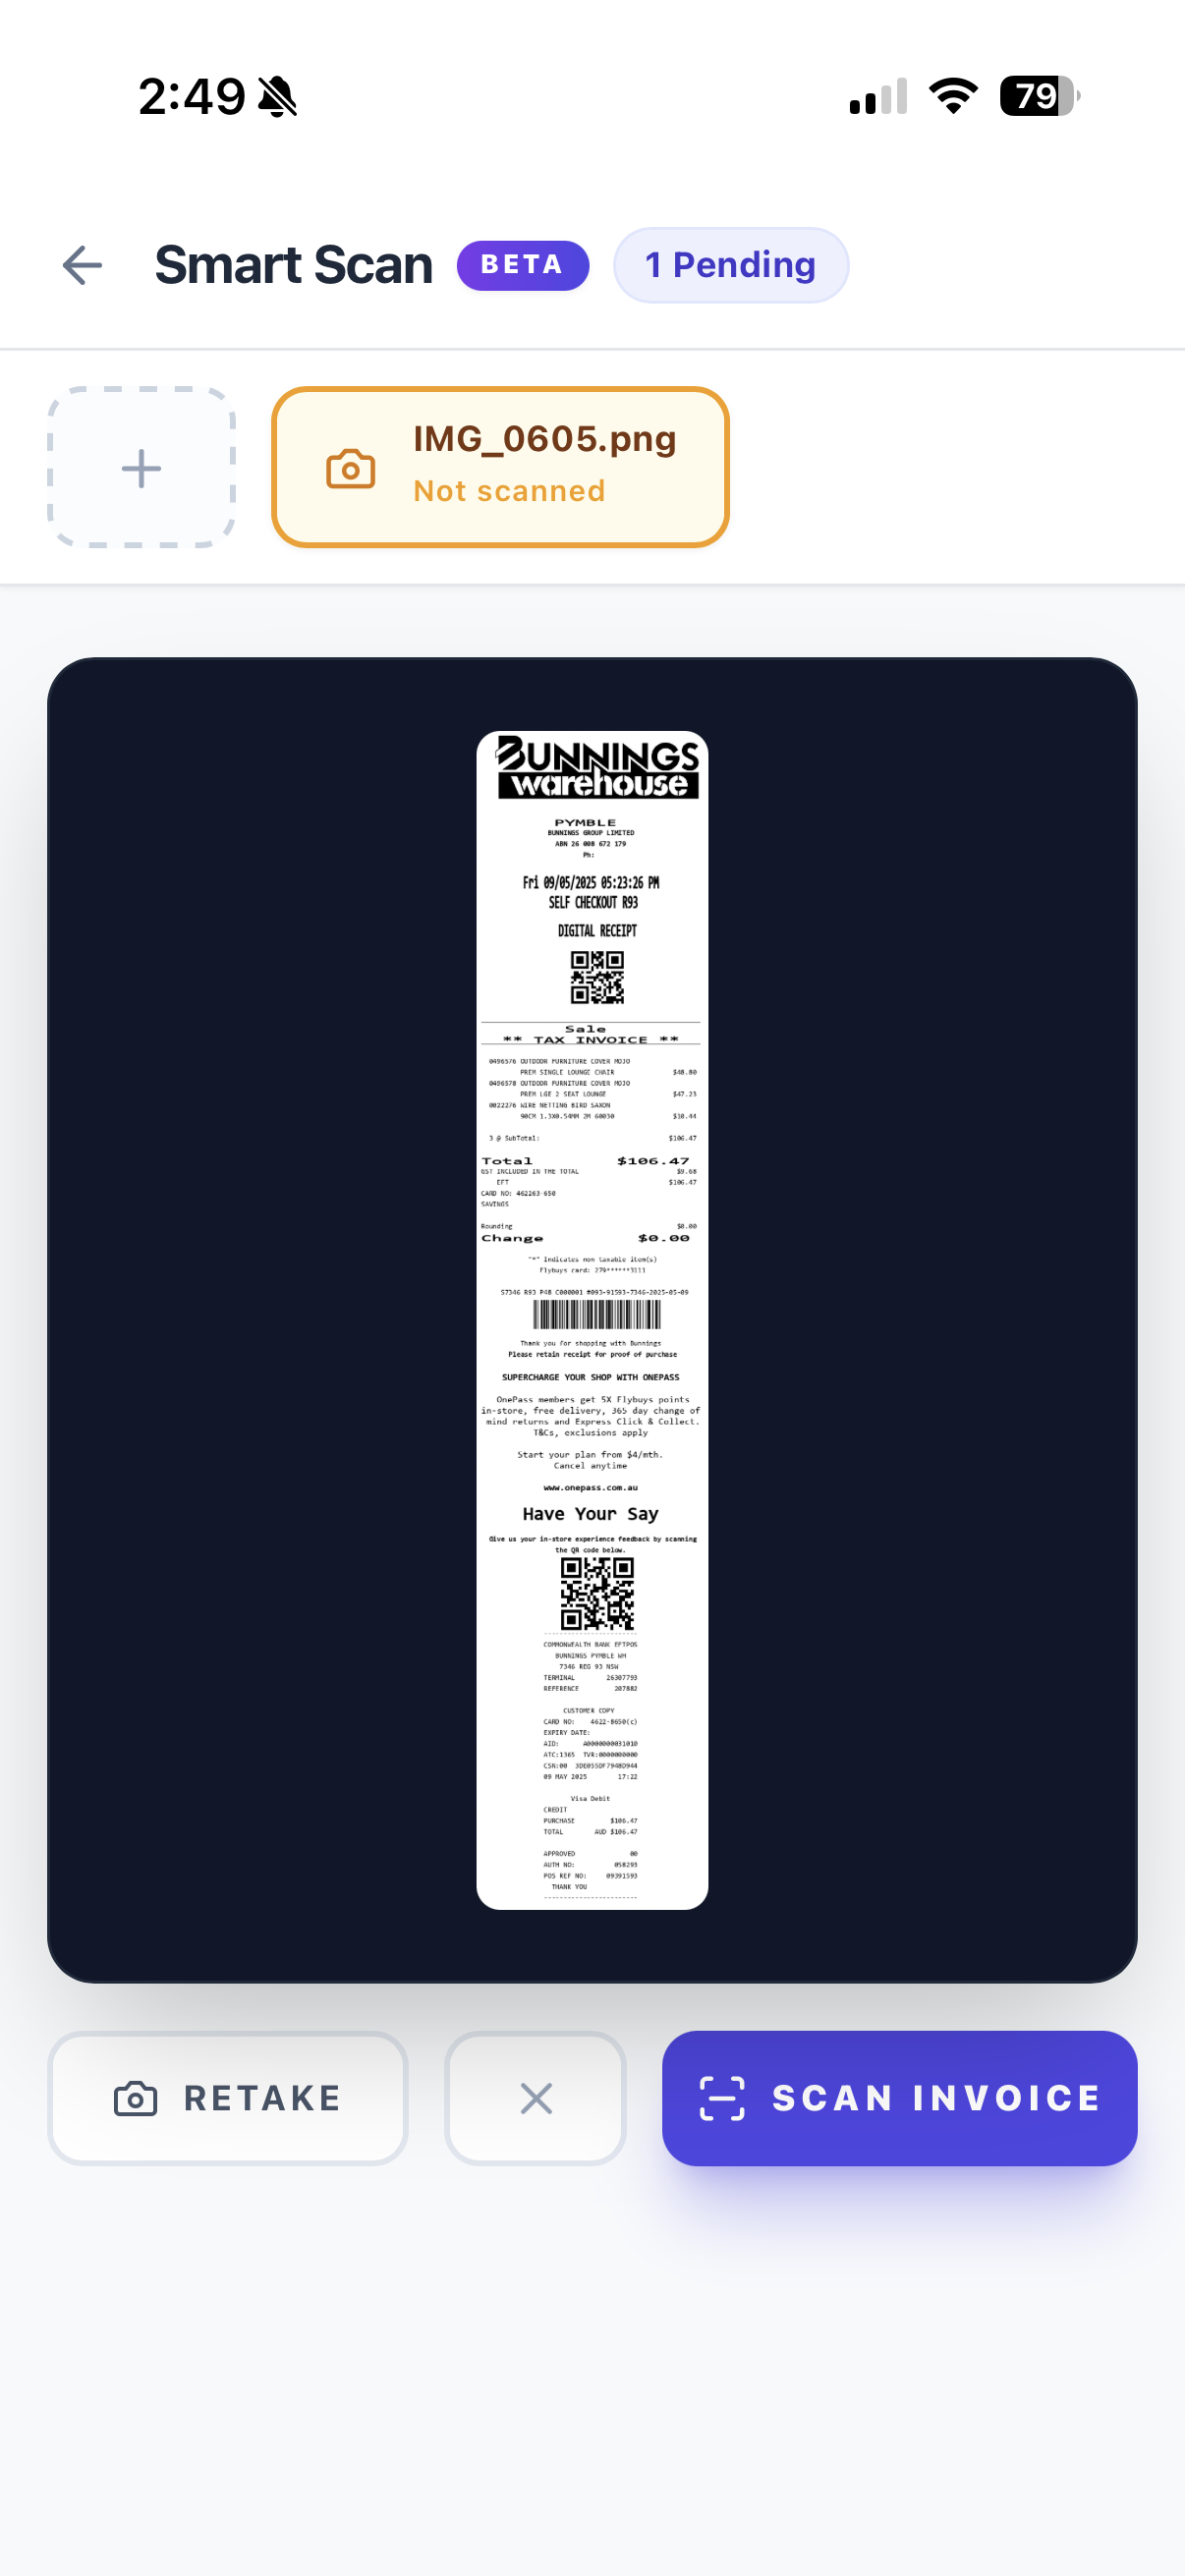
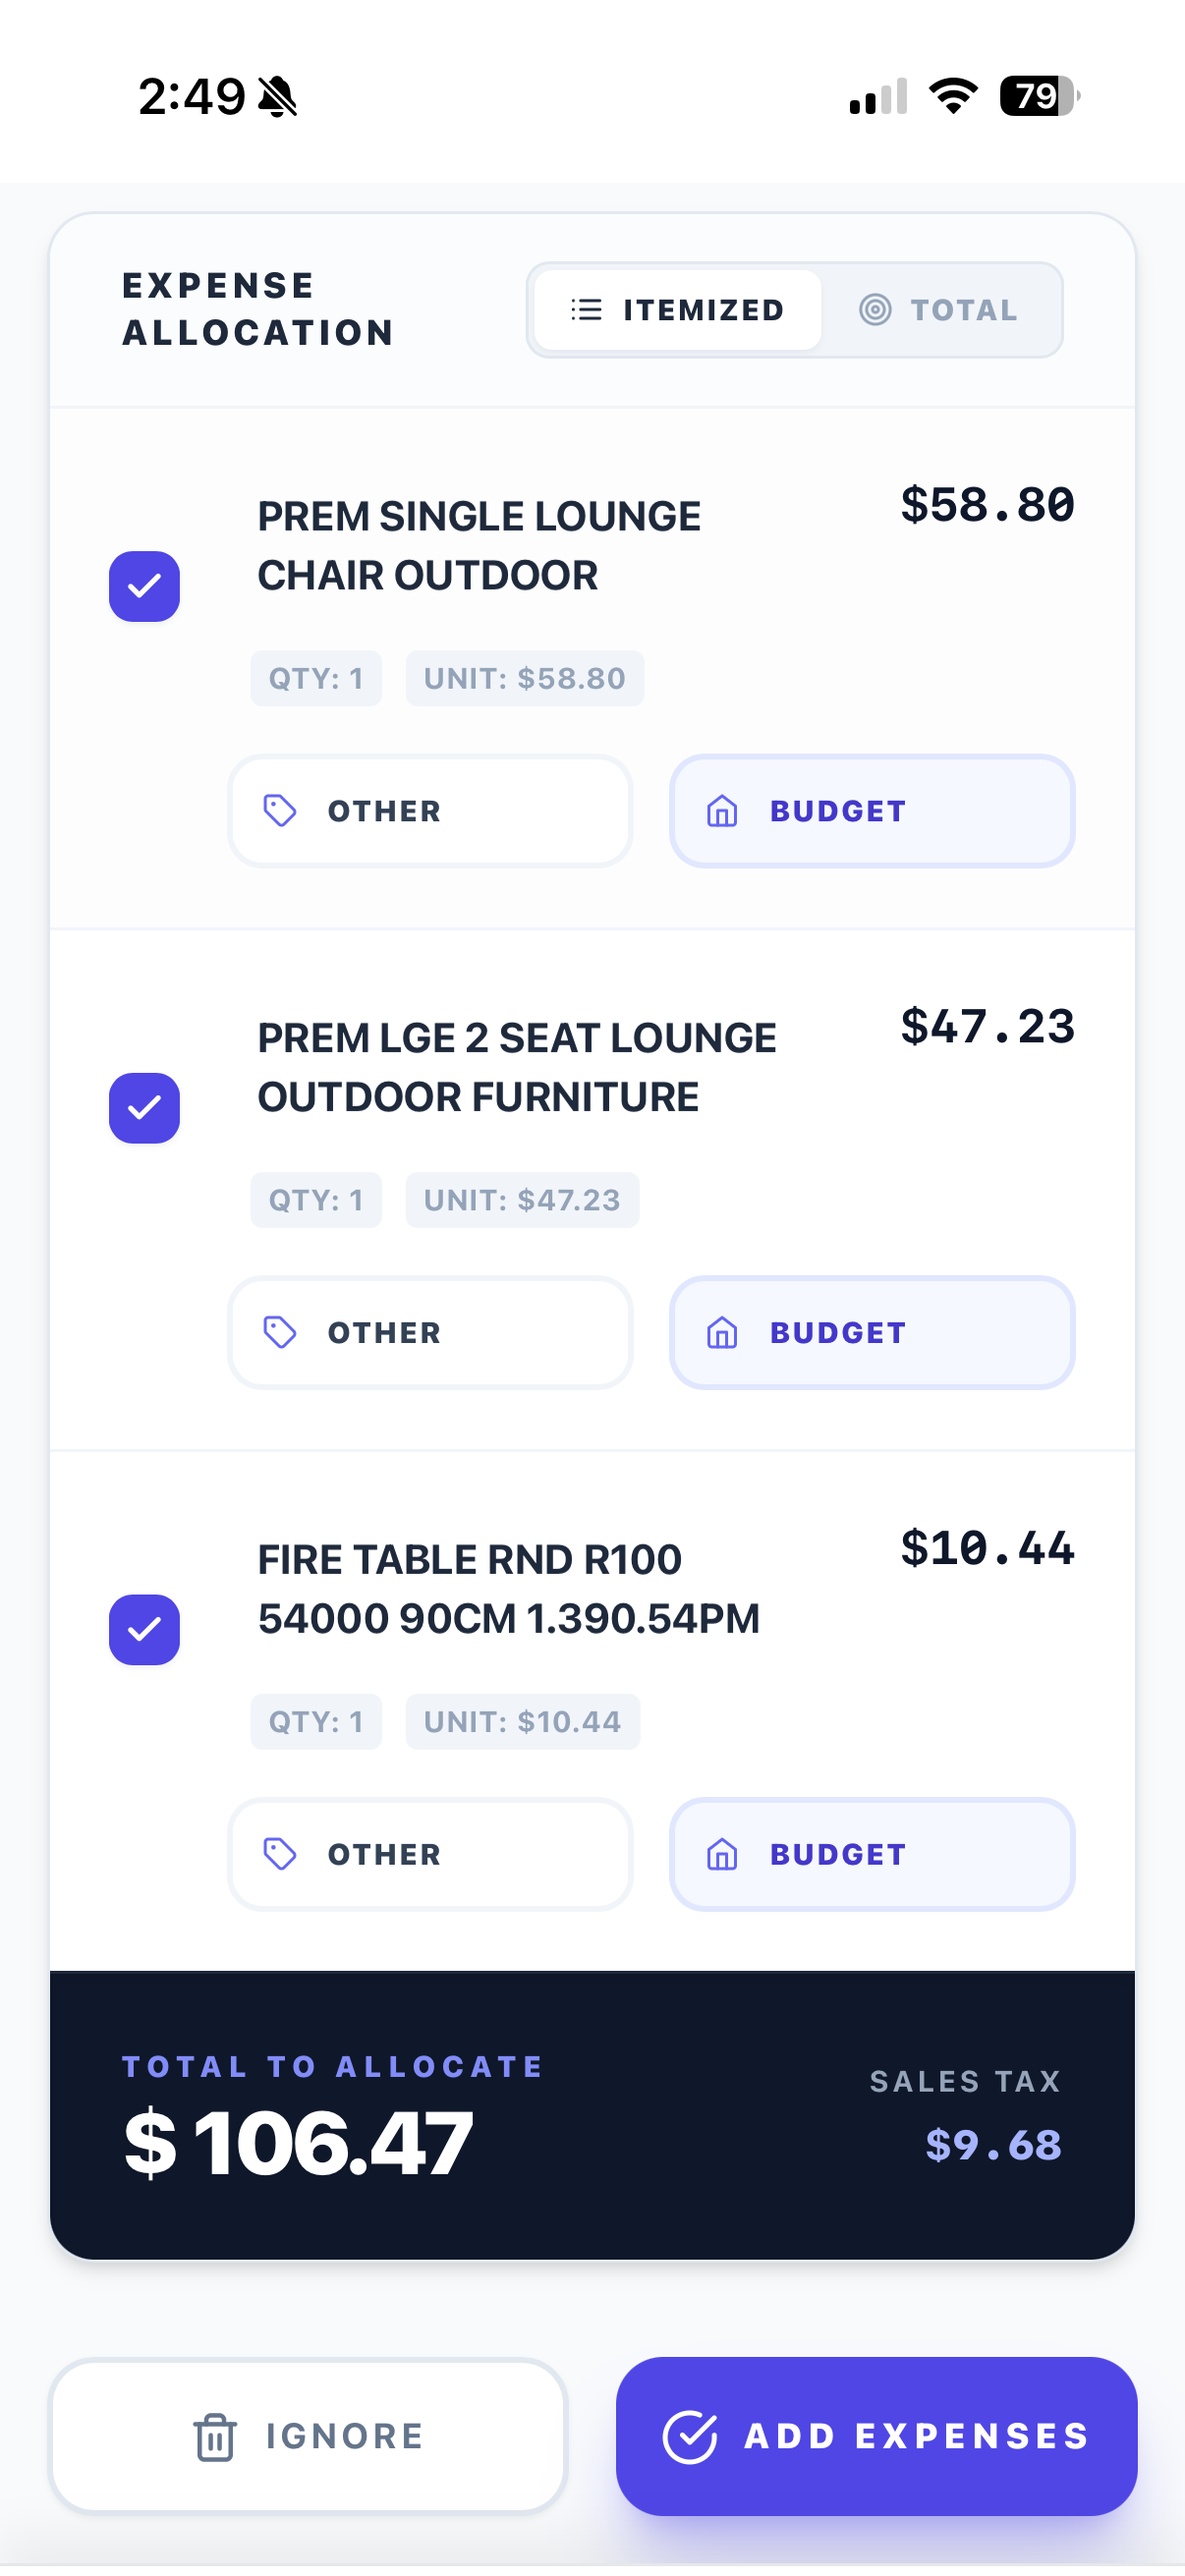
Simply snap a photo of any invoice or receipt and Budget My Reno will automatically extract the key details and categorise the expense for you. You can also upload PDFs.
Process documents whenever you're ready
You don't have to process documents straight away. Queue them up for later if it suits you. For example, you might be at a hardware store and quickly snap a photo of your receipt, but you're not ready to add it to your budget yet. The photo stays in your queue until you're ready to process it—no rush.
Customise before you add
When you're ready to process a document, Budget My Reno uses AI to automatically categorise the expense and extract the details. But you're in control. If the category isn't quite right, change it. You'll also need to assign it to a budget—like Kitchen or Bathroom—before adding it.
Feel free to rename the description if it's not clear, or exclude any line items that aren't part of your renovation. This way you only capture what matters.
Keep everyone in the loop by sharing your renovation project with family members, partners, or contractors. Control who can view and edit the budget, and collaborate in real-time to keep your project running smoothly.
How to share
Simply tap the person icon and add the member's name and email address. They'll receive an email, and the next time they log into Budget My Reno, they'll see the shared project.
Shared projects at a glance
You'll notice the project card displays a green icon when a project is being shared—so you always know which projects are collaborative.
Everyone can edit
Anyone you share the project with has permission to edit the details. All their changes are tracked in the Activity Log, so you have a complete audit trail of who changed what and when.

Set up milestone payments
Once you've added an expense, click on it to edit and set up a payment schedule. You can break down the expense into milestone payments—like a deposit, stage 1, final payment, etc.—and set a due date for each.
Track what's paid and what's coming
As each milestone is paid, mark it on the payment schedule screen. This gives you a clear view of what you've already paid and what's coming up. That way you can plan ahead and budget for upcoming payments.

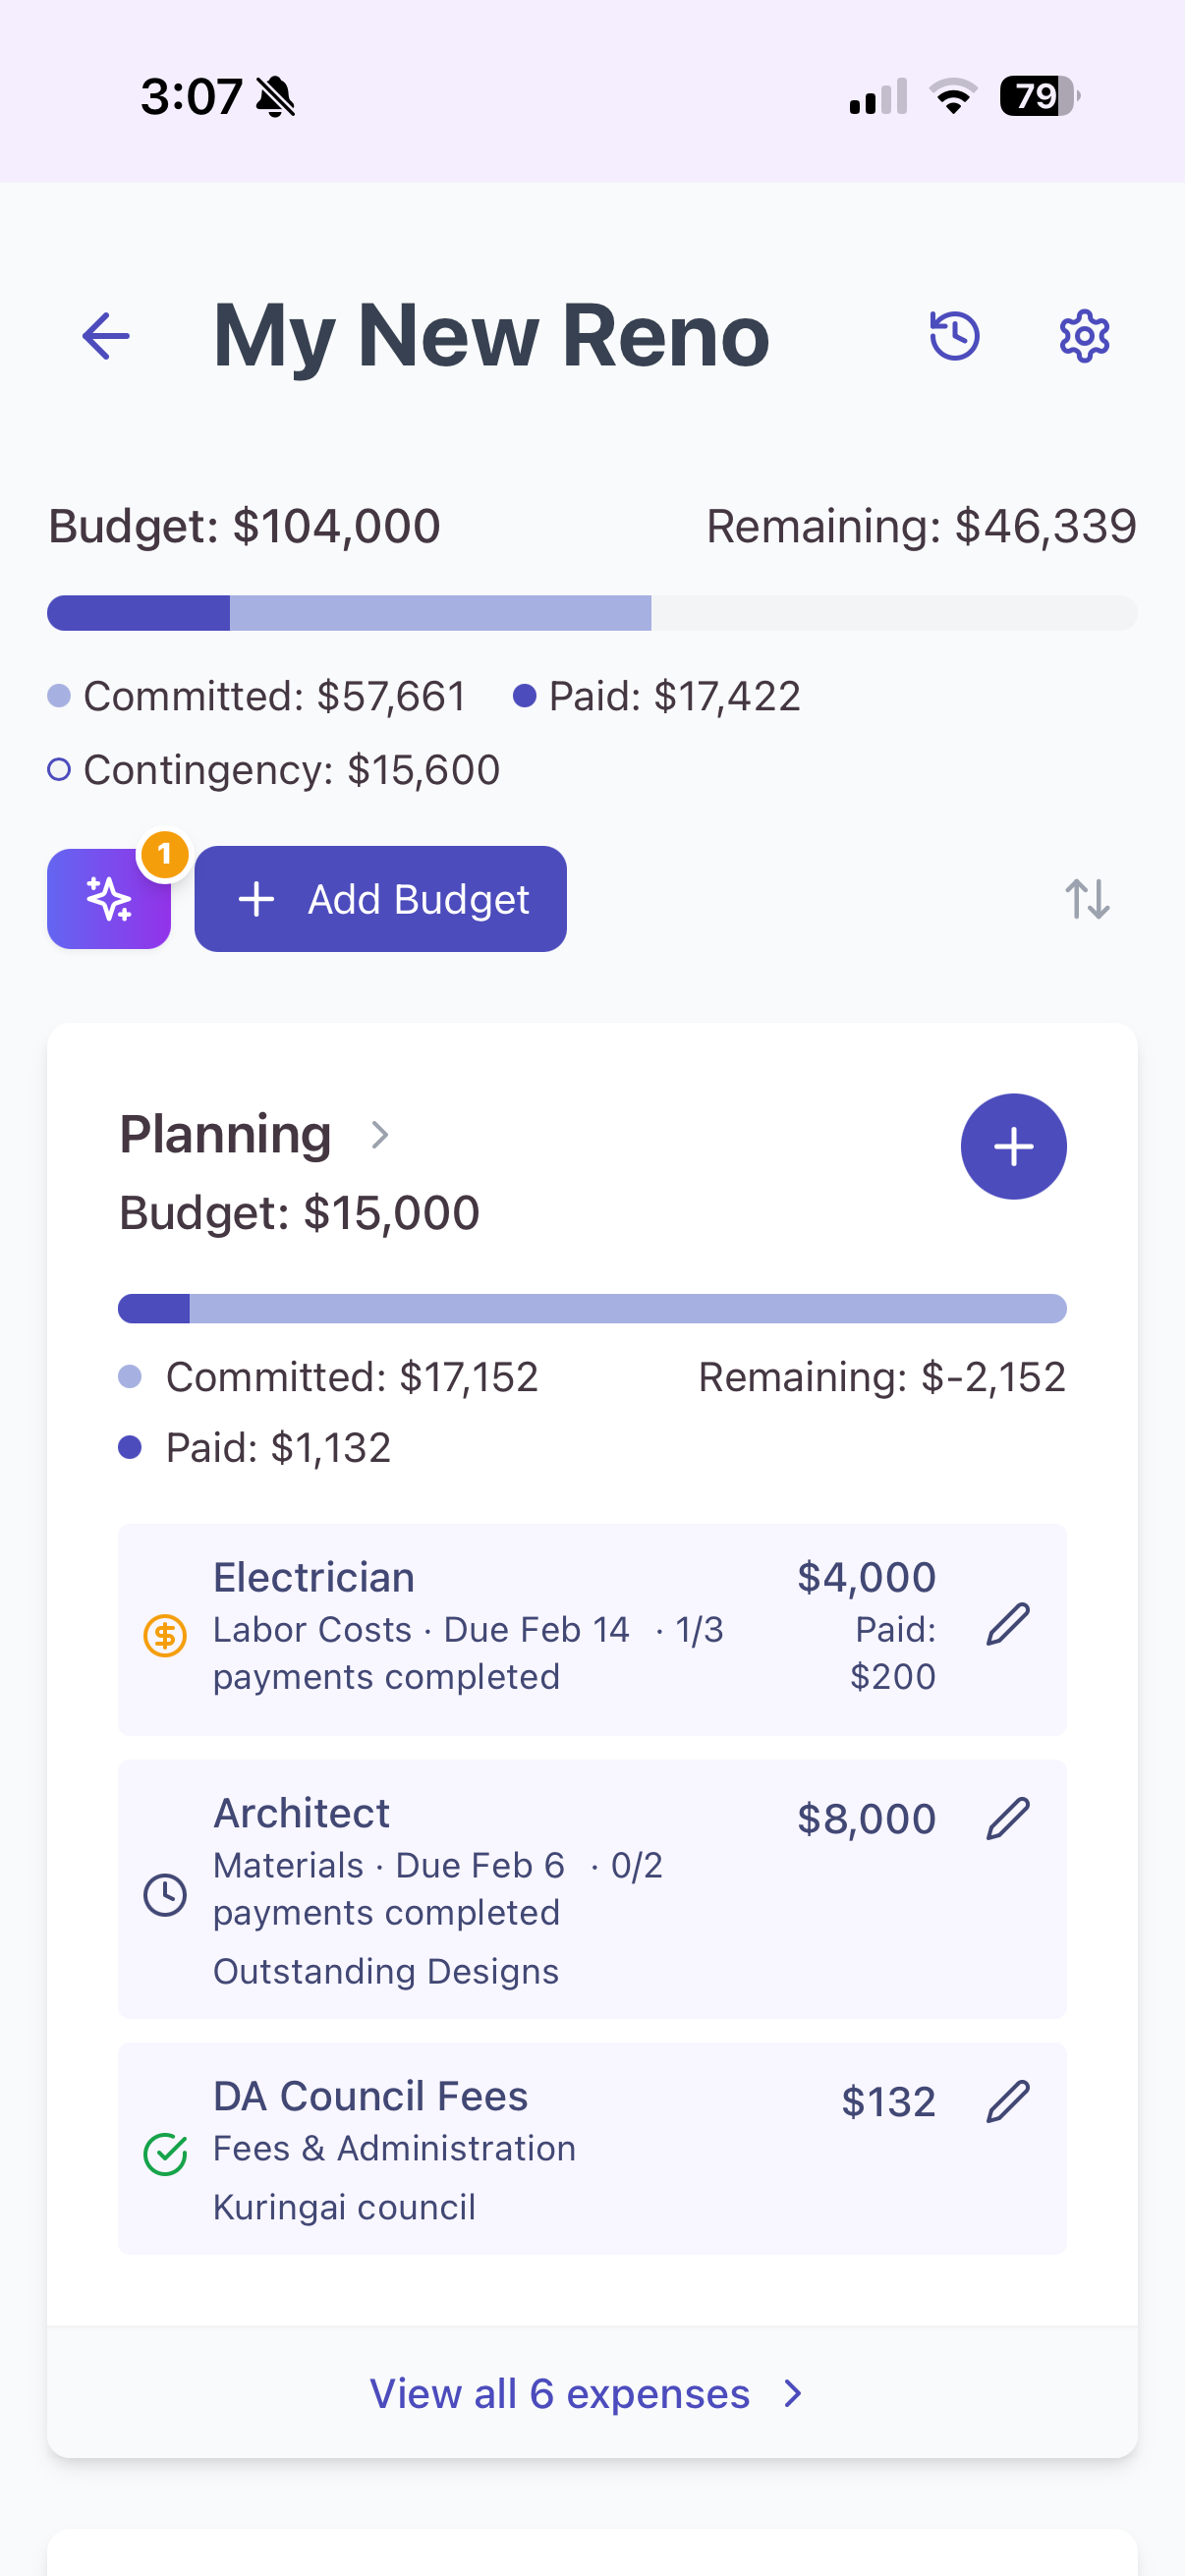
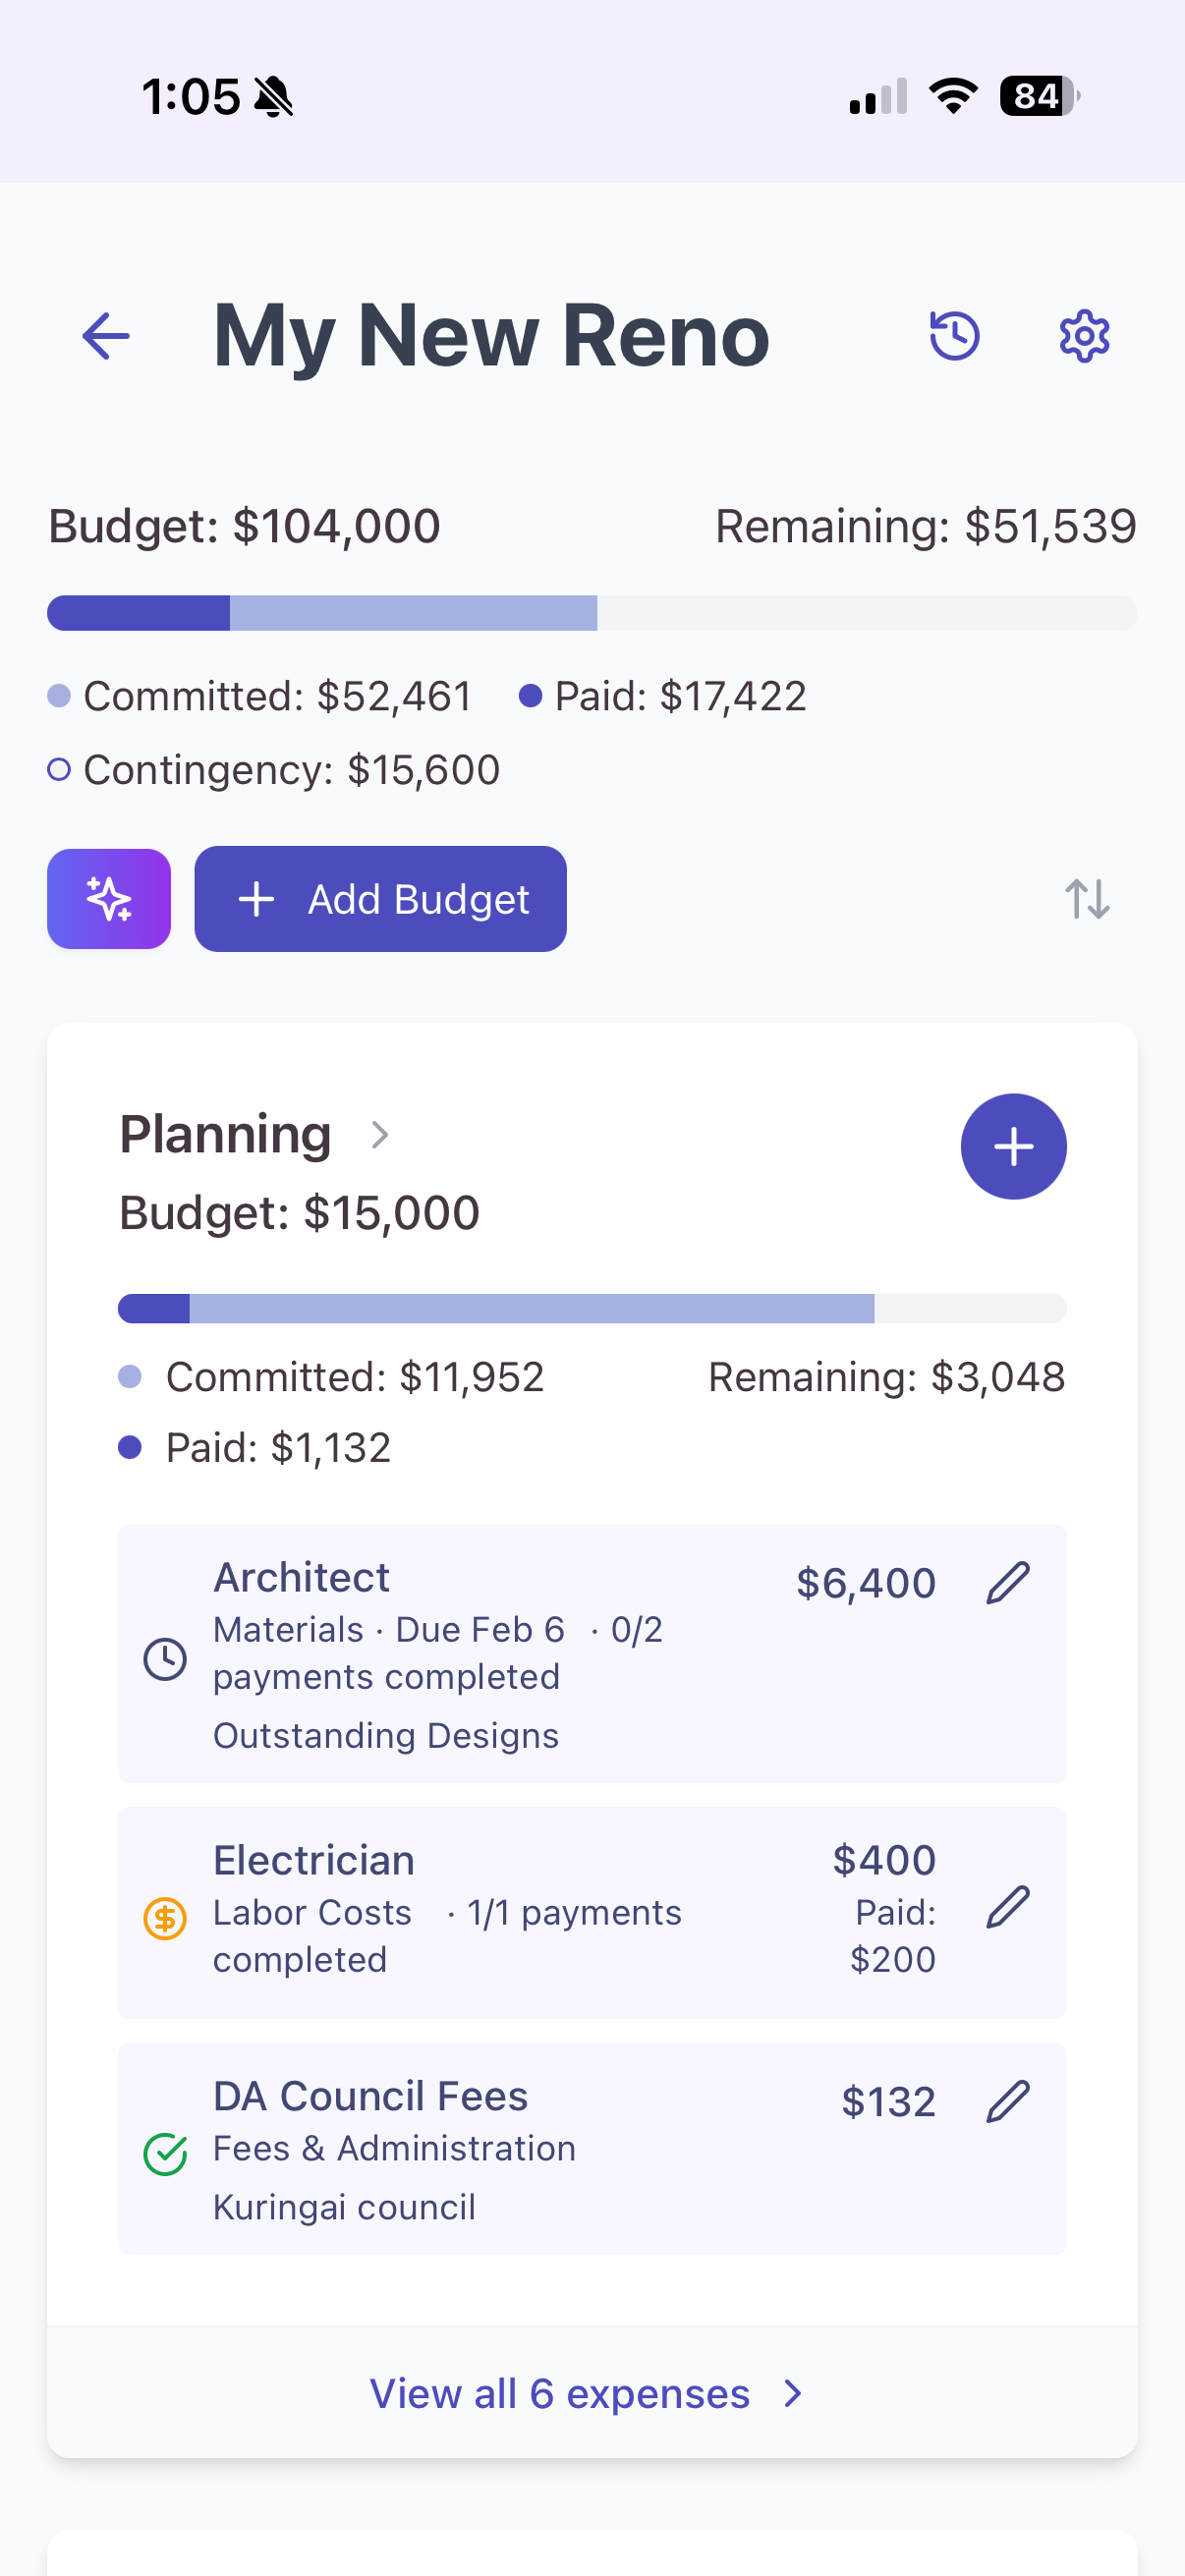
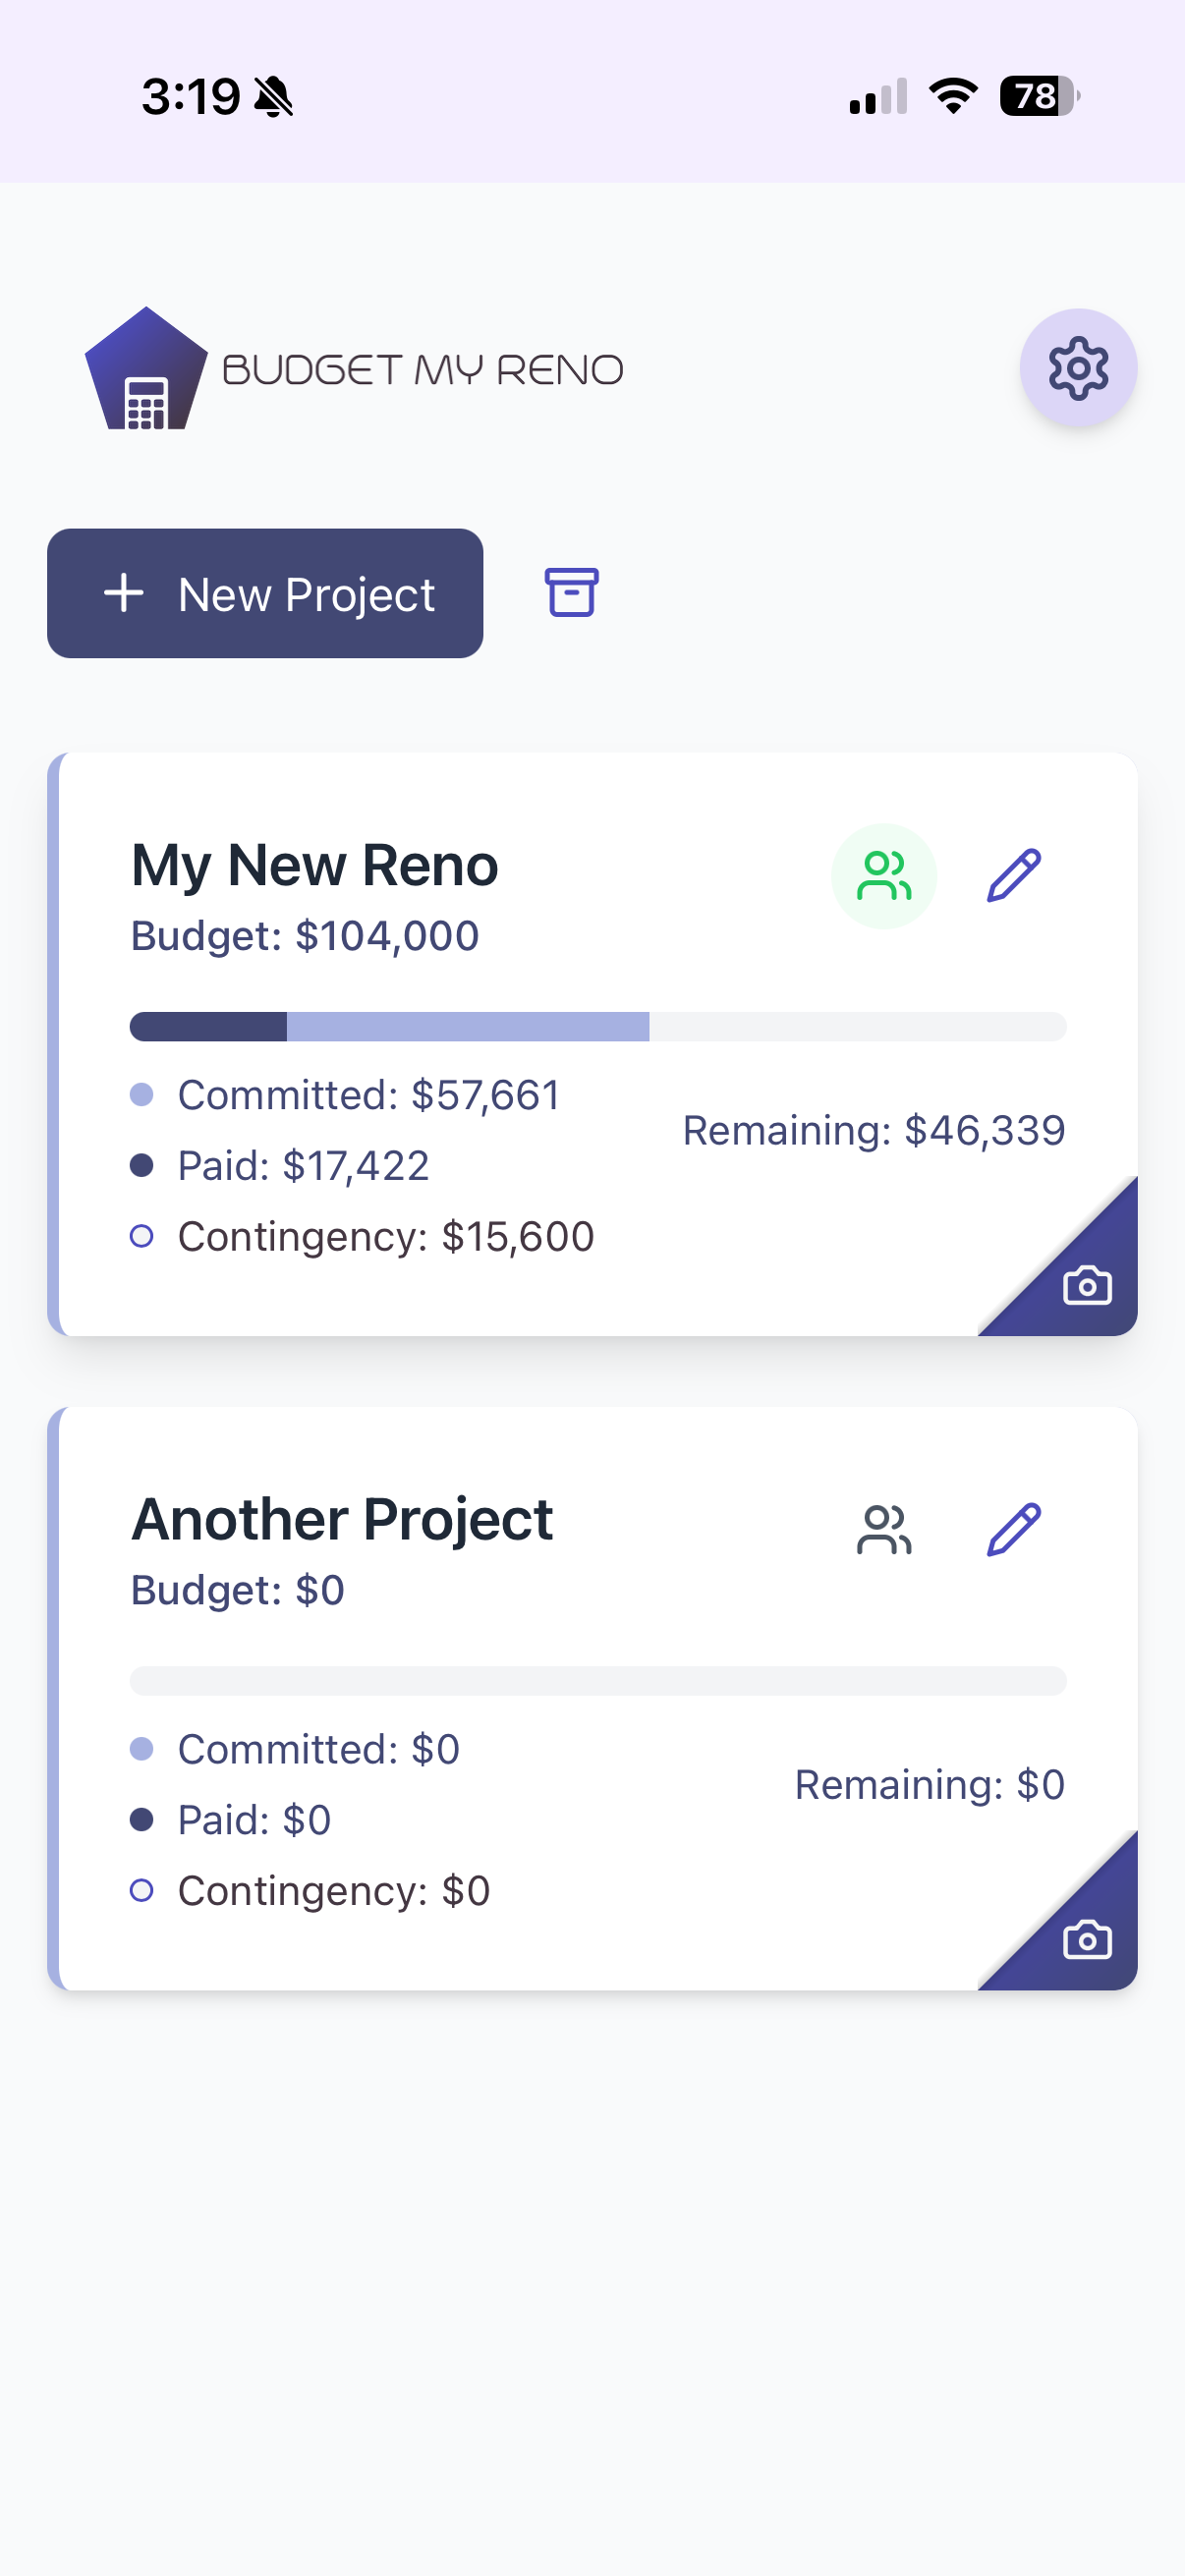
On the main screen you can see all your expenses in one consolidated view. This gives you a clear picture of your renovation's financial status.
Understanding your numbers
Budget – The total amount you've allocated across all your budget categories (Bathroom, Kitchen, etc.)
Remaining – Your budget minus all the expenses you've entered so far
Committed – All expenses you've added
Paid – Only those expenses that have been paid
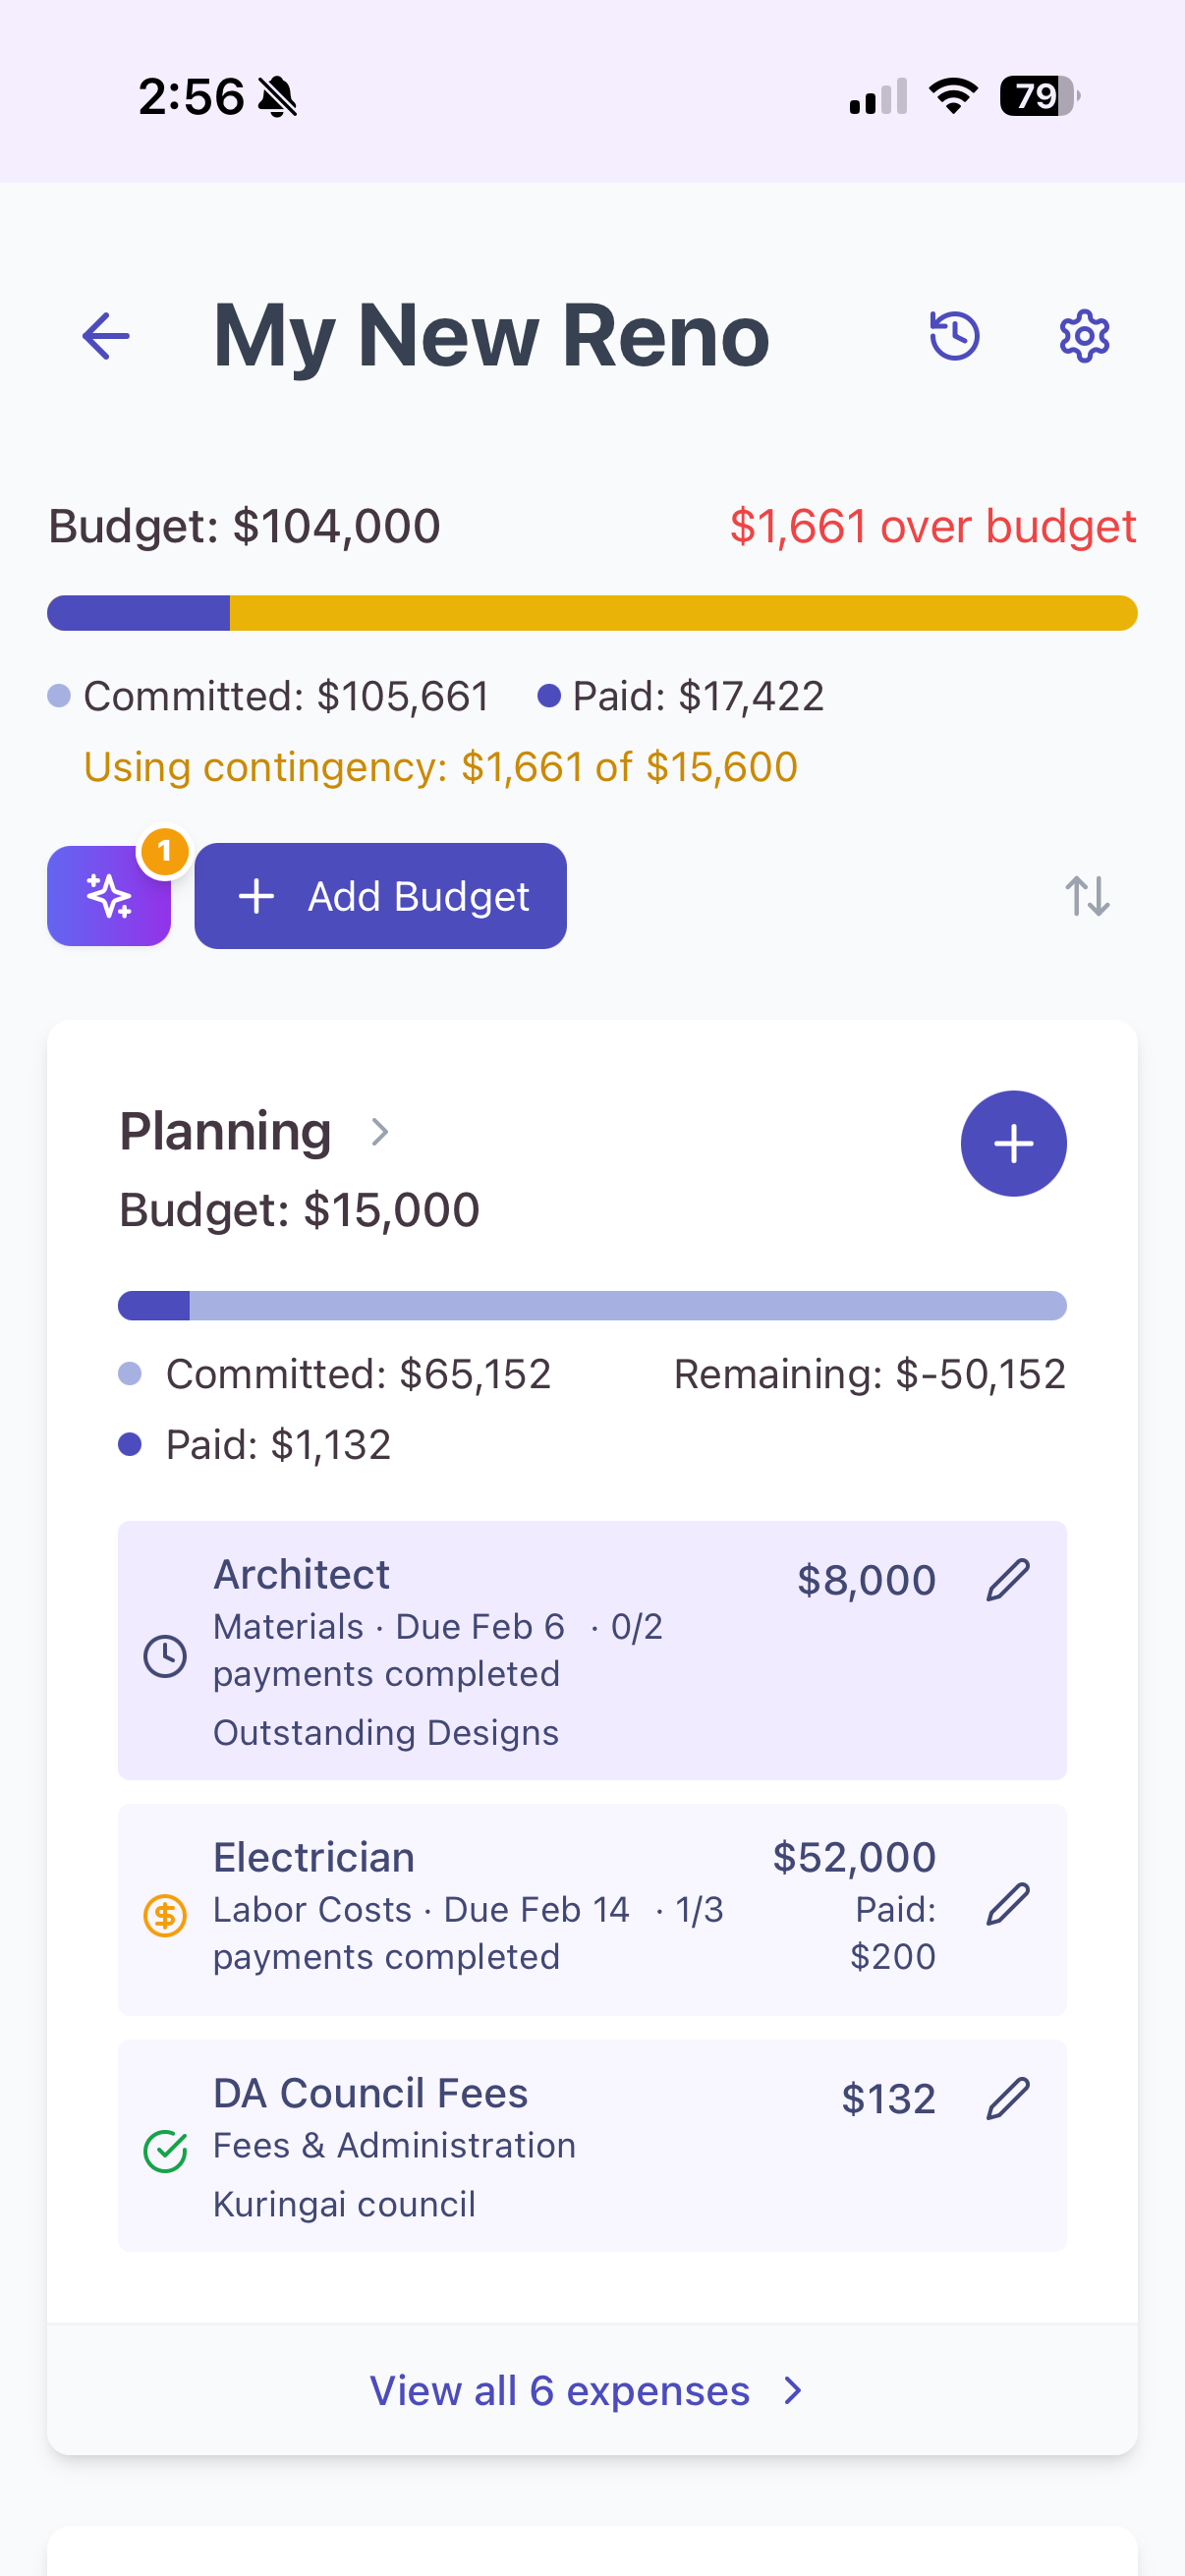
Contingency buffer
When you first set up your project, you allocated a contingency percentage—a safety buffer for unexpected costs. As you spend, this comes into play: once your remaining budget runs out, any new expenses draw from your contingency instead.
The status indicator changes colour to show your contingency status: yellow when you're using contingency, and red once it's fully used up. This gives you an at-a-glance warning if you're heading over budget.